Photoshop制作夢幻耶穌光和高光背景【英】(2)
文章來源于 Tutsplus,感謝作者 Marko Kožokar 給我們帶來經精彩的文章!Step 3
Press Control-Shift-U on your keyboard to desaturate this layer and set its Opacity to 58%.
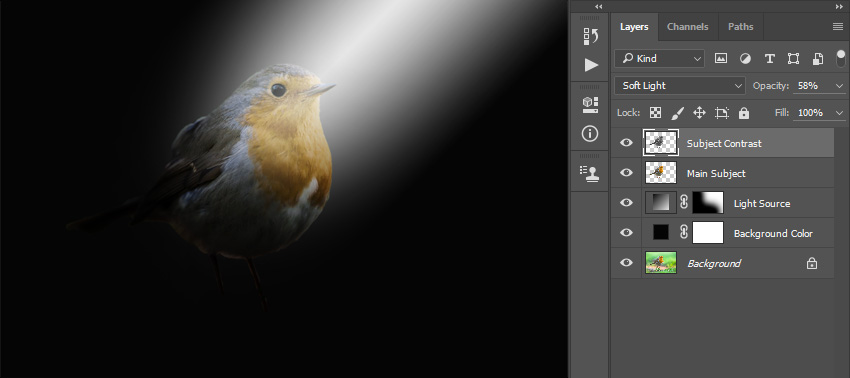
Step 4
Now press Control-J to duplicate this layer and name the new layer Subject Details.
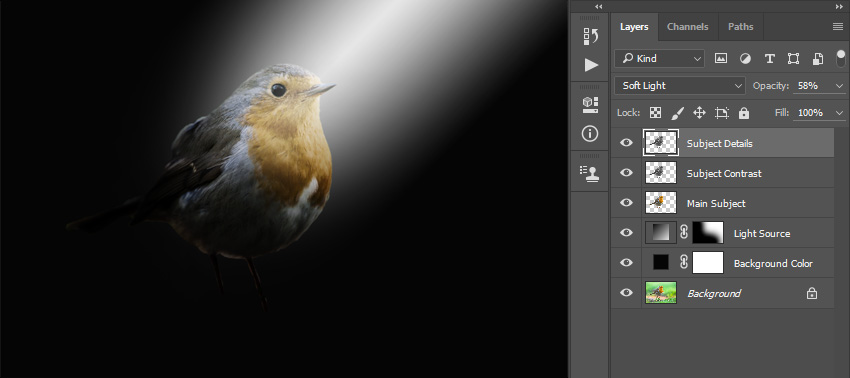
Step 5
Change the Opacity of this layer to 100%. Then, go to Filter > Other > High Pass and set the Radius to 35 px as shown below:
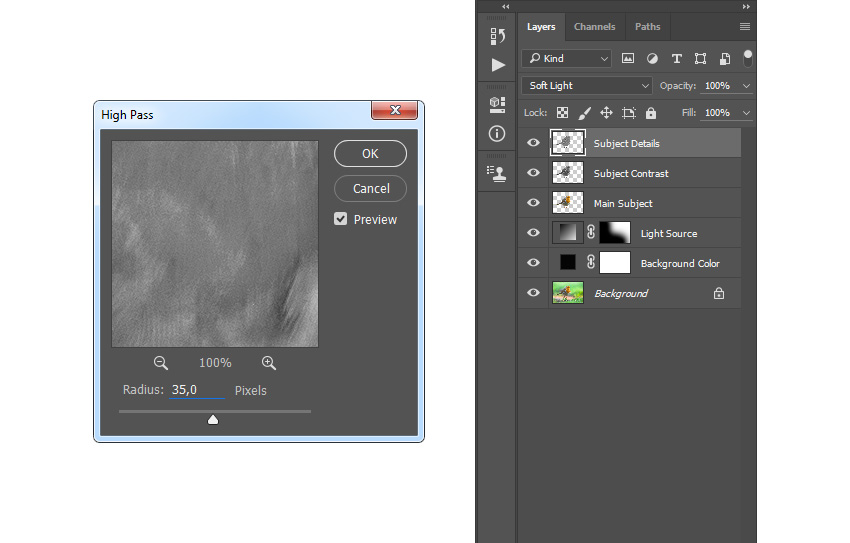
Step 6
Now select the Subject Contrast layer and press Control-J on your keyboard to duplicate it. Then, drag this new layer to the top of the layers in the Layers panel and name it Subject Sharpening.
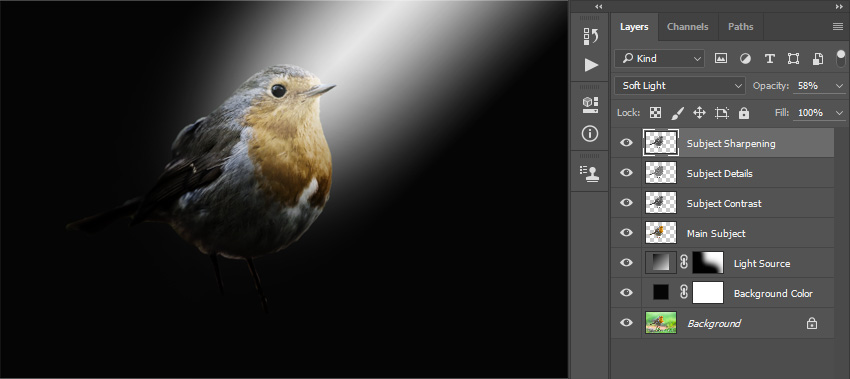
Step 7
Change the Blending Mode of this layer to Overlay and Opacity to 100%. Then, go to Filter > Other > High Pass and set the Radius to 2 px as shown below:
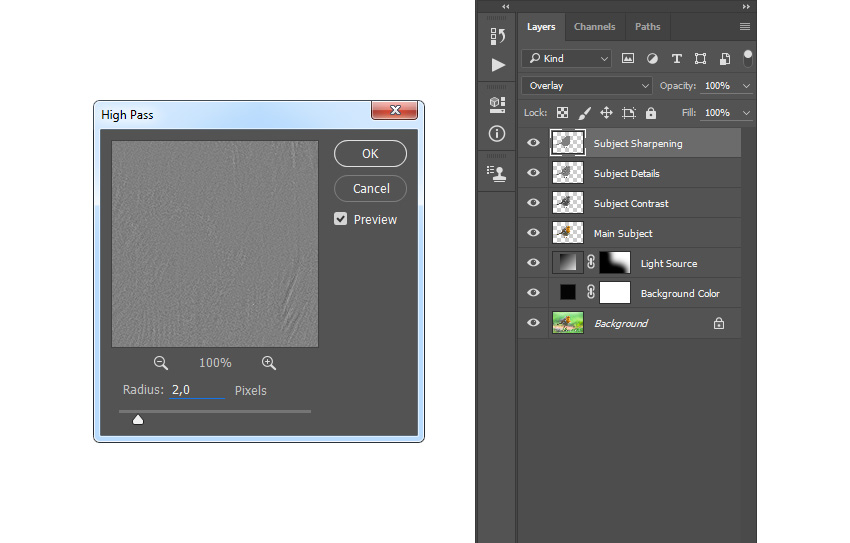
Step 8
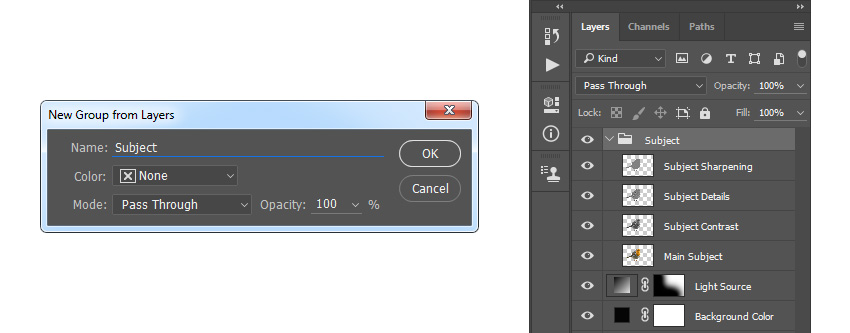
Now Shift-click on the Main Subject layer to select all subject layers at the same time. Then, go to Layer > New > Group from Layers to create a new group from the selected layers and name it Subject.
Step 9
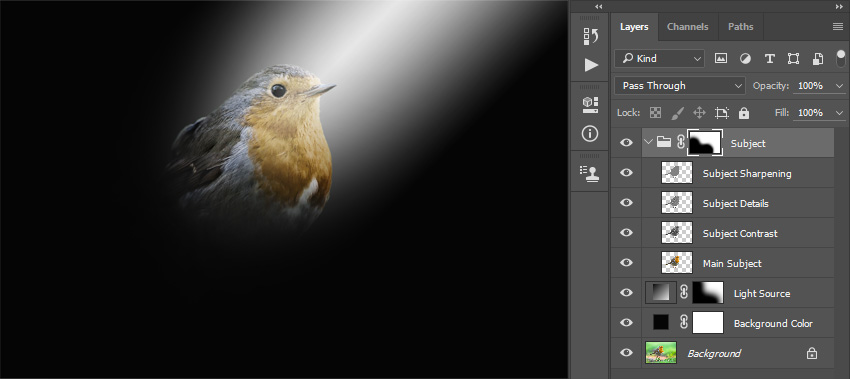
Go to Layer > Layer Mask > Reveal All to add a blank layer mask. Then choose the Brush Tool (B), pick a soft brush, set the foreground color to #000000, and brush onto the mask as shown below:
Step 10
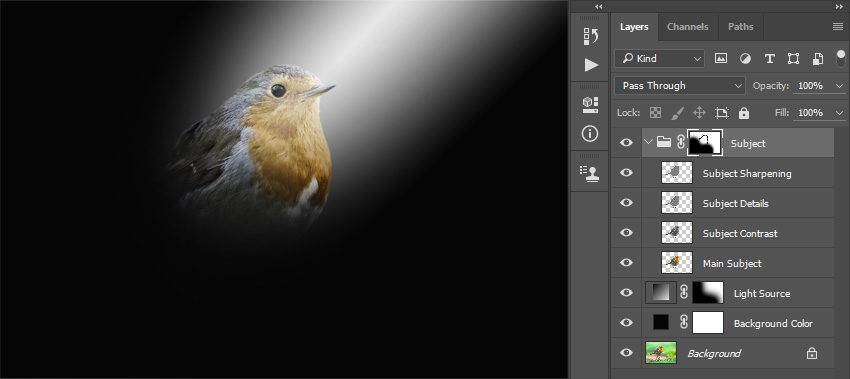
Now pick a small soft brush and brush over the edges of the subject where needed to blend the subject more.
5. How to Create the Textures
Step 1
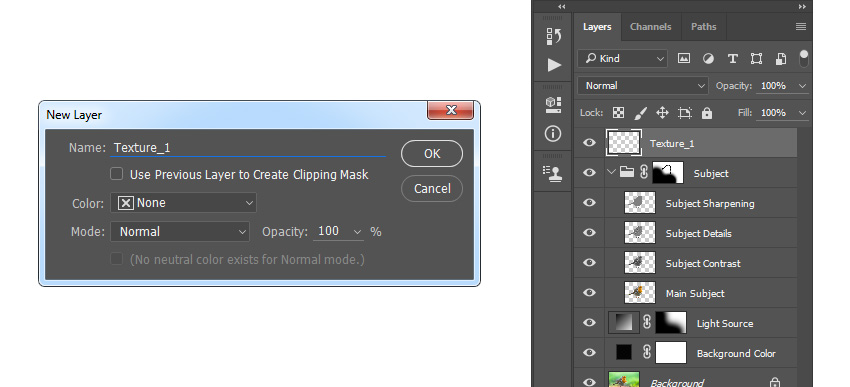
In this section, we are going to create textures. Go to Layer > New > Layer to create a new layer and name it Texture_1.
Step 2
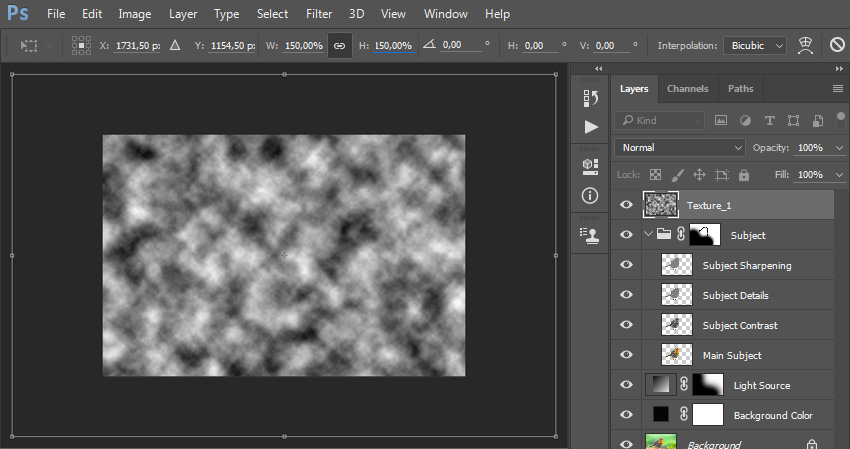
Now press D on your keyboard to reset the swatches and go to Filter > Render > Clouds. Then, pressControl-T on your keyboard and set the Width and Height to 150% as shown below:
Step 3
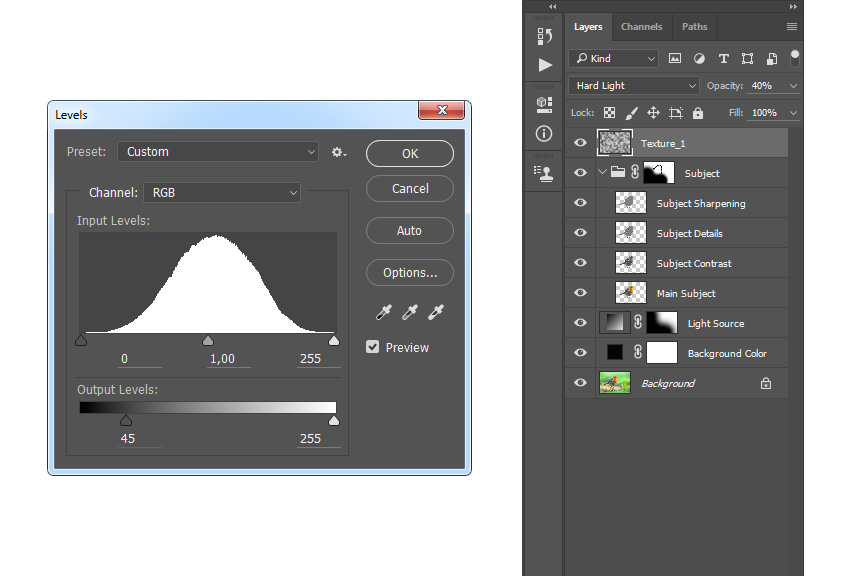
Change the Blending Mode of this layer to Hard Light and set the Opacity to 40%. Then go to Image > Adjustments > Levels and use the settings below:
Step 4
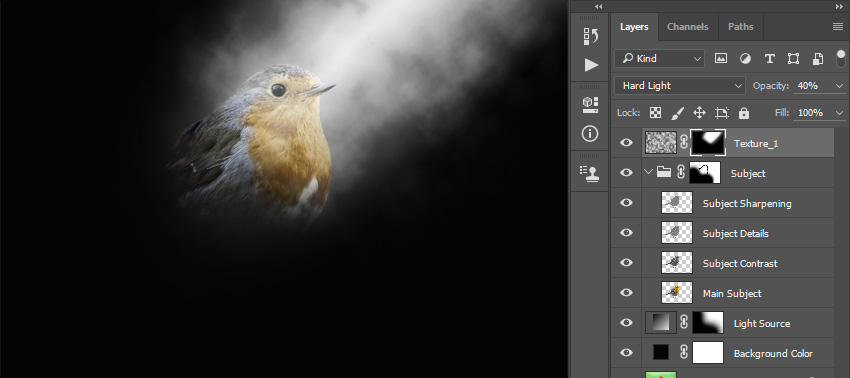
Now go to Layer > Layer Mask > Hide All to add a layer mask that hides the whole layer. Then, choose the Brush Tool (B), pick a soft brush, set the foreground color to #ffffff, and brush onto the layer mask as shown below:
 愛你不要你
愛你不要你
-
 Photoshop制作復古風格的老照片效果【英】2018-04-23
-
 Photoshop合成長著創意大樹的長頸鹿【英】2018-04-23
-
 Photoshop合成冰凍特效的金魚場景【英】2018-02-10
-
 Photoshop合成夢幻風格的森林場景【英】2018-02-10
-
 Photoshop合成正在施法的巫師【英】2018-02-10
-
 Photoshop制作金屬質感的3D立體字【英】2018-01-09
-
 Photoshop設計火焰燃燒藝術字教程【英】2018-01-09
-
 Photoshop合成夢幻風格的森林場景【英】
相關文章24492018-02-10
-
 Photoshop制作星光裝飾的圣誕樹【英】
相關文章6472017-12-16
