Photoshop�ϳ�����ʩ��������Ӣ��
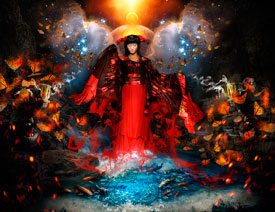
����Դ�� photoshoptutorials.ws�����x���� MARIA SEMELEVICH �o�҂����������ʵ����£�Learn how to this surreal photo manipulation of an Great Enchantress with Photoshop. In this tutorial, you’ll learn how to create your amazing atmosphere and adventure tales with realistic shadows and lighting, then complete it with a bleak color tone effect. Throughout the tutorial, you’ll learn techniques that will help you create better matte paintings and photo manipulations. Read this tutorial and find out how easy it is!
�̳��زģ�ħ�����x��������PS�̳��ز�
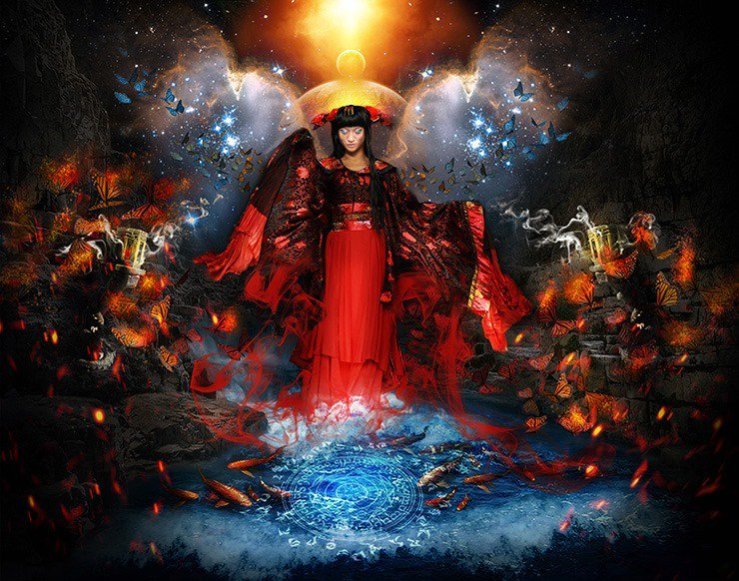
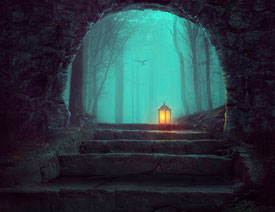
What you’ll be creating
Let’s start creating pictures by creating a landscape, then add mystical items. The next step is to create the model and work with animals. The final step will be drawing the shadows and work on atmospheric paintings, correction and adding effects. You’ll need any version of Photoshop, inspiration and good mood!
Step 1
Begin with we will create a vast landscape for our further manipulations. I believe that we will create that – something like an amphitheater. This will give depth and mystery our picture.
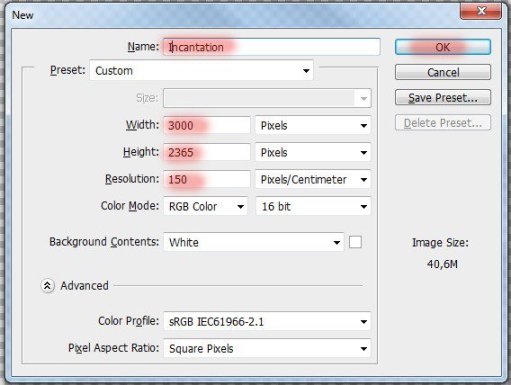
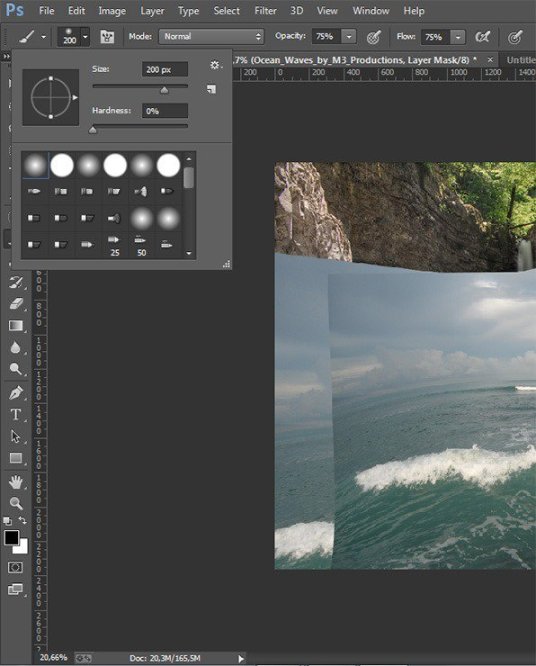
Start by creating! Create a new document. Go to File > New or the short key Ctrl+ N. A blank document with size of 3000 pixels wide and 2365 pixels high. I named the document “Incantation”.
Step 2
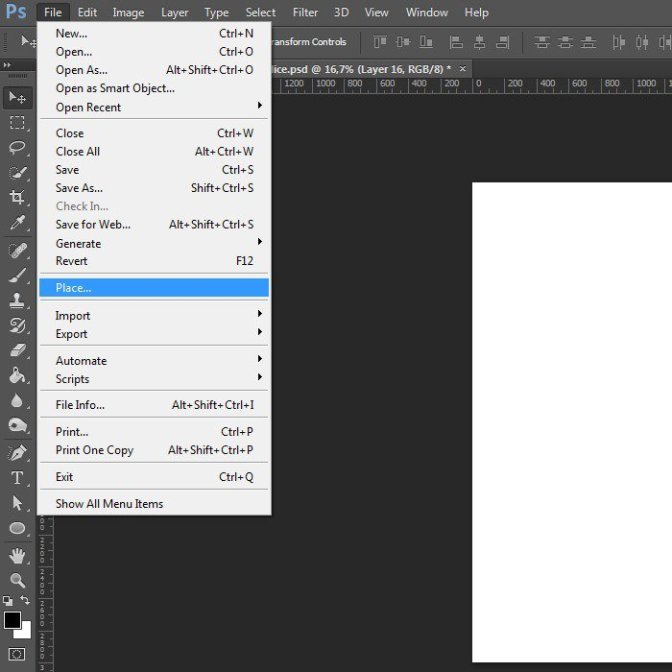
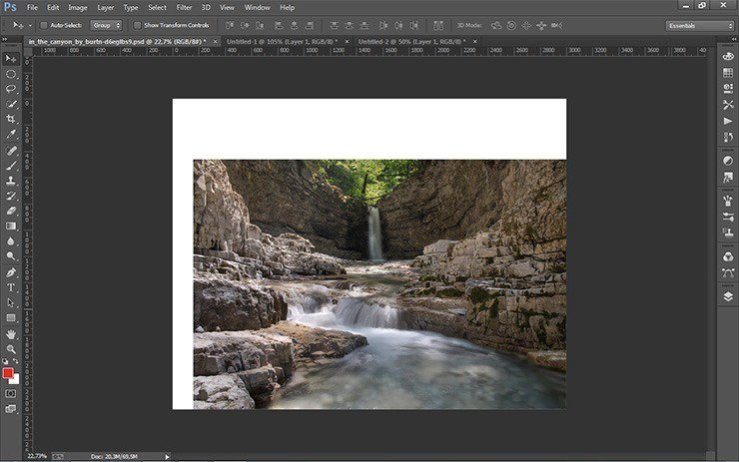
Let’s start off adding the landscape to our manipulation. Go to File > Place and select the image of landscape.
Step 3
After addition Place a landscape in the lower right corner without changing its size.
Step 4
Duplicate the landscape 2 times. The short key Ctrl+ J.
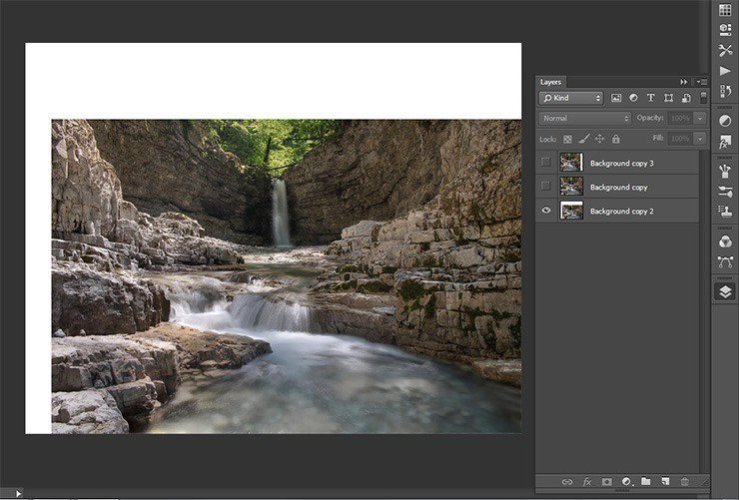
Step 5
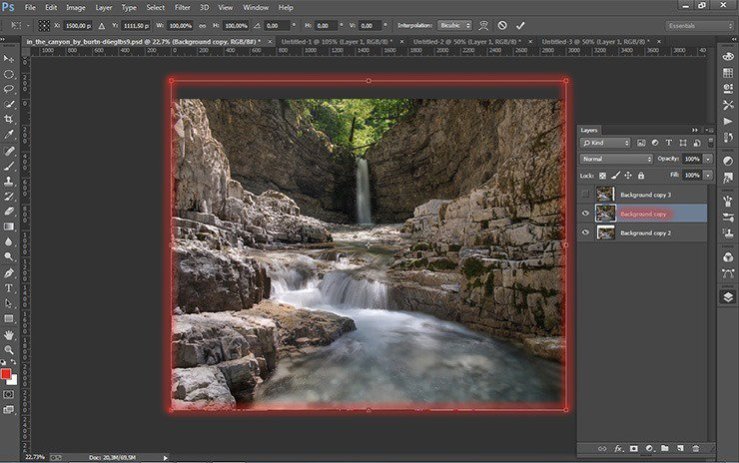
Transform (the short key Ctrl+ T) the layer “background copy” on the size of a little more the working document.
Step 6
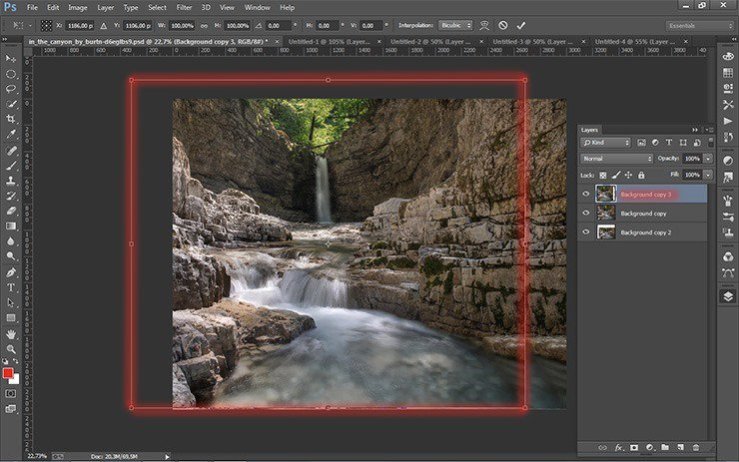
Repeat the same with the last layer. Transform (the short key Ctrl+ T) the layer “background copy2” on the size of a little more the working document. Place it to the left, as shown in Figure.
All we have done is to make the landscape more and more expressive. I think that if all the original picture landscape stretch for the entire document, it is not realistic to happen and there will be little space for our next steps.
Step 7
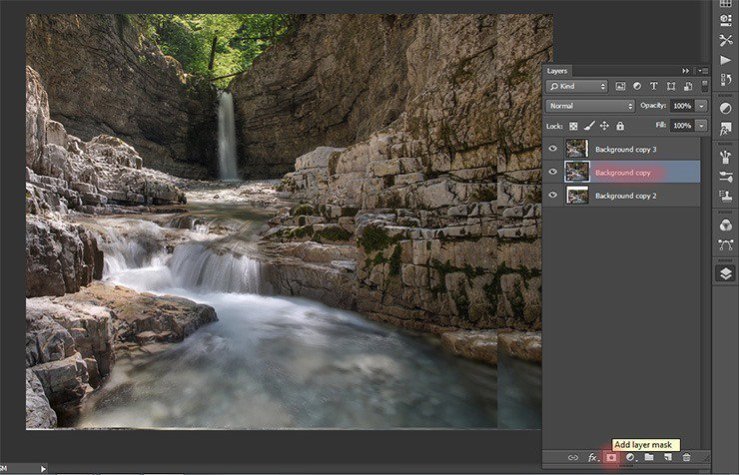
Begin to create. You have a unique opportunity to become briefly creator and create a new piece of magical scenery :) First, add a layer mask to “background copy” By clicking on the layer mask icon in the Layers panel.
Step 8
Now take the Brush Tool (B) on the toolbar. Expose what settings Size: 200px, Hardness: 0% Opacity: 50% Flow: 100%. Press D to set the color to black and white. Be sure to brush should be soft for a smooth transition between the layers background.
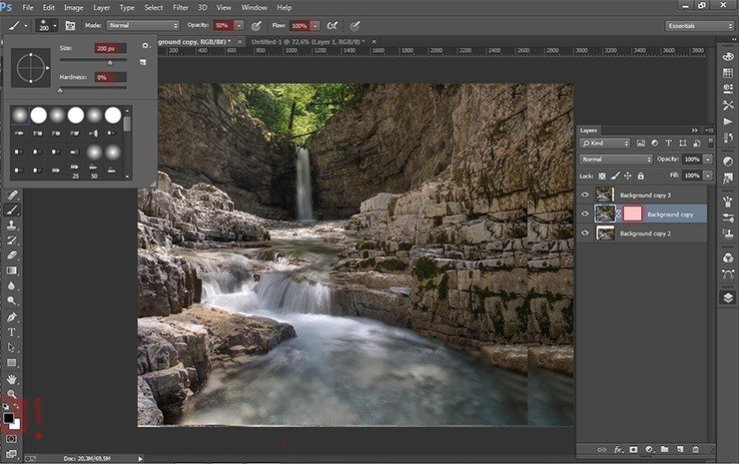
Step 9
Begin to change. Turn off the top layer with the background by clicking on the eye icon in the Layers panel Activate the layer mask and remove the brush part of the landscape as shown. Draw black color.

Step 10
That’s how I got.

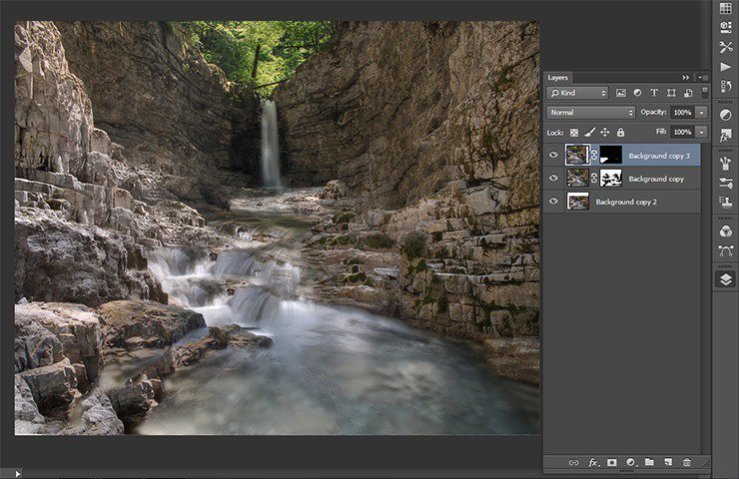
Step 11
If you find that an option that arranges proceed to the next layer. Add a layer mask to the layer “background copy2” and remove some of the excess. To make it easier to paint over the stone, and then invert the layer mask (the short key Shift+ Ctrl+ I).

Step 12
That’s it. Our landscape is ready. Now proceed to the creation of water. In the original image, water is not dynamic, so I decided to add dynamic waves. This will give freshness and unusual images.
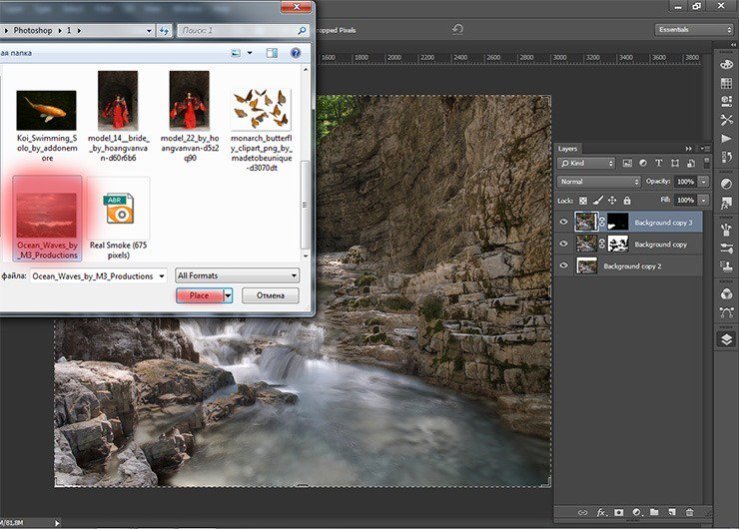
Step 13
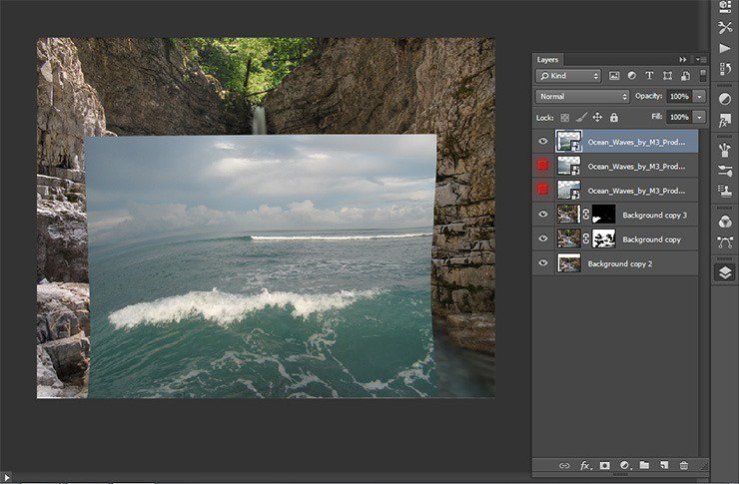
Go to File > Place and select the image of wave.
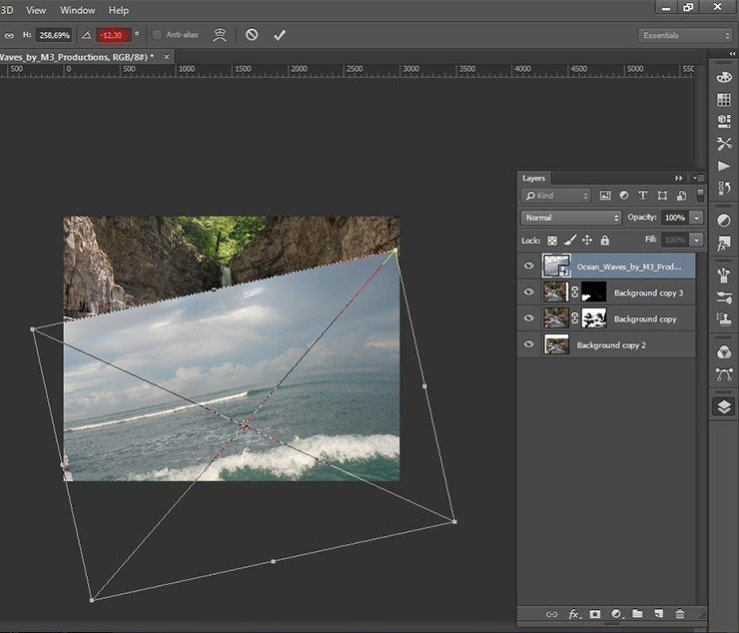
Step 14
Now transform the image placed so that a large wave was a little farther from the edge of the document and the edges of the wave touches the shore landscape and rotate the image by an angle -12, 30.
Step 15
Now duplicate the layer with the wave and transform it. Click LMB from the list, select Flip Horizontal. To apply the changes, click Enter. Move the wave a little left.
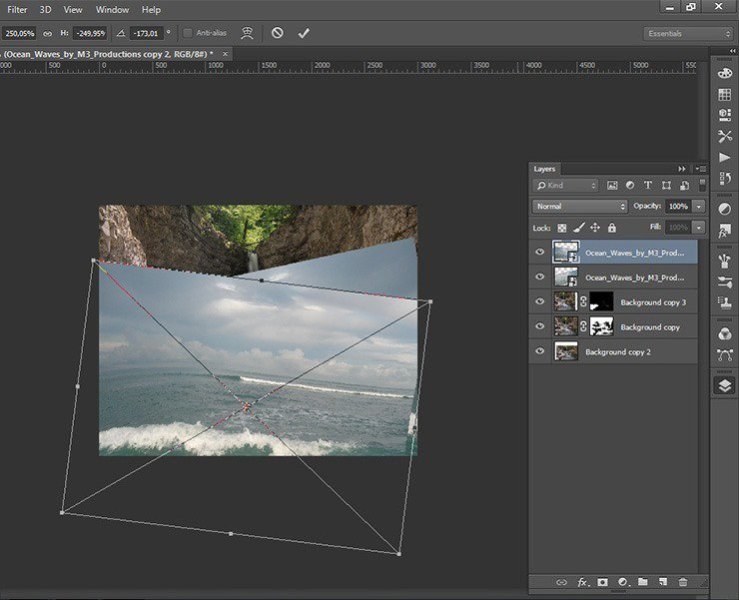
Step 16
Now duplicate the layer with the wave and change its size. Make it a little smaller and move it closer to the falls.
Step 17
Now merge the layers with a wave of the group. Click on the desired layers hold Shift and click on the folder icon in the Layers panel or the short key Ctrl+ G. Rename the group, double click on the group name and call it “wave”.
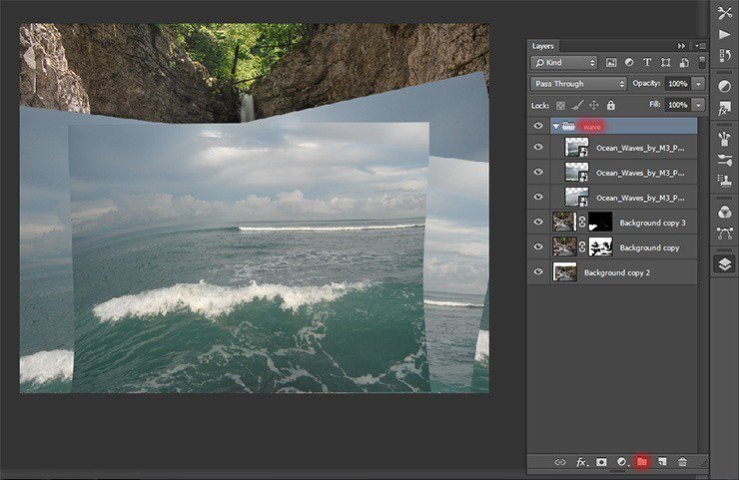
Step 18
Now remove the unwanted parts of waves that they are only in the riverbed. Add to each layer with a layer mask clicking on the mask icon in the Layers panel.
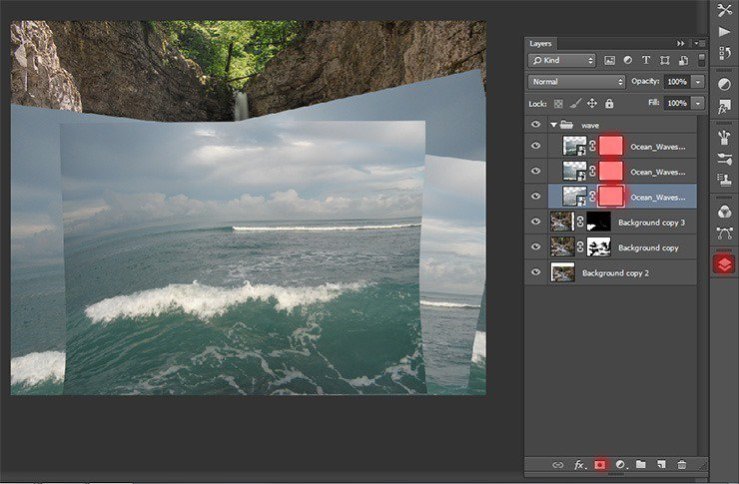
Step 19
Select the Brush Tool (B) and use the settings: Size: 200px, Hardness: 0% Opacity: 75%, Flow: 70%. Be sure to check the main color black.
Step 20
Remove unnecessary part of each layer. make invisible the upper layers by clicking the eye icon near the desired layer. So it will be easier to work.

 ��ǵ���
-
 Photoshop�������L�������ƬЧ����Ӣ��2018-04-23
-
 Photoshop�ϳ��L����������L�i¹��Ӣ��2018-04-23
-
 Photoshop�ϳɱ�����Ч�Ľ��~������Ӣ��2018-02-10
-
 Photoshop�ϳɉ����L���ɭ�ֈ�����Ӣ��2018-02-10
-
 Photoshop�ϳ�����ʩ��������Ӣ��2018-02-10
-
 Photoshop���������|�е�3D���w�֡�Ӣ��2018-01-09
-
 Photoshop�OӋ����ȼ��ˇ�g�ֽ̡̳�Ӣ��2018-01-09
-
Photoshop�������L�������ƬЧ����Ӣ��
���P����11882018-04-23
-
Photoshop�ϳ��L����������L�i¹��Ӣ��
���P����13832018-04-23
-
Photoshop�ϳɱ�����Ч�Ľ��~������Ӣ��
���P����34052018-02-10
-
 Photoshop�����S���|�����w�֡�Ӣ��
���P����7422018-02-10
Photoshop�����S���|�����w�֡�Ӣ��
���P����7422018-02-10
-
 Photoshop�����@�G����3D���w��
���P����14682018-02-10
Photoshop�����@�G����3D���w��
���P����14682018-02-10
-
Photoshop�ϳɉ����L���ɭ�ֈ�����Ӣ��
���P����24492018-02-10
-
 Photoshop�������p���ع����w
���P����6532018-01-09
Photoshop�������p���ع����w
���P����6532018-01-09
-
 Photoshop����ľ�ذ�LOGO��ӡЧ����Ӣ��
���P����19272018-01-09
Photoshop����ľ�ذ�LOGO��ӡЧ����Ӣ��
���P����19272018-01-09
