Photoshop��������Ү�d��߹ⱳ����Ӣ��
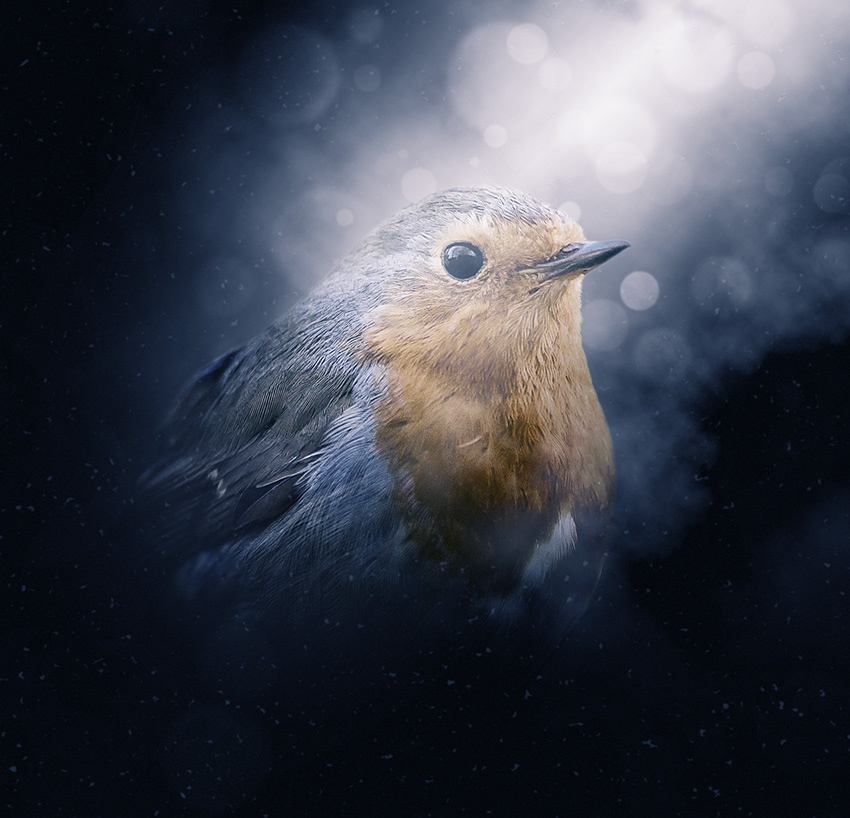
����Դ�� Tutsplus�����x���� Marko Kožokar �o�҂����������ʵ����£�In this tutorial you will learn how to create an amazing, enchanted effect. I will try to explain everything in so much detail that everyone can create it, even those who have just opened Photoshop for the first time.
1. Let's Get Started
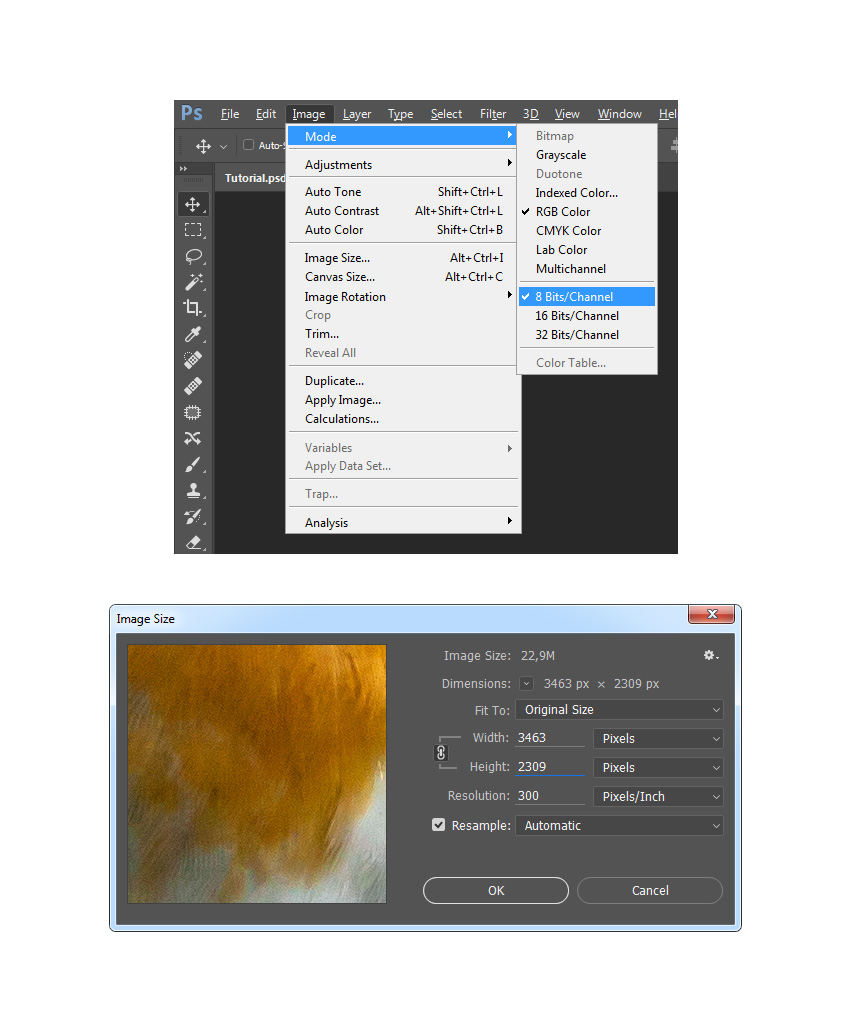
First, open the photo that you want to work with. To open your photo, go to File > Open, choose your photo, and click Open. Now, before we get started, just check a couple of things:
Your photo should be in RGB Color mode, 8 Bits/Channel. To check this, go to Image > Mode.
For best results, your photo size should be 1500–4000 px wide/high. To check this, go to Image > Image Size.
Your photo should be the Background layer. If it is not, go to Layer > New > Background from Layer.
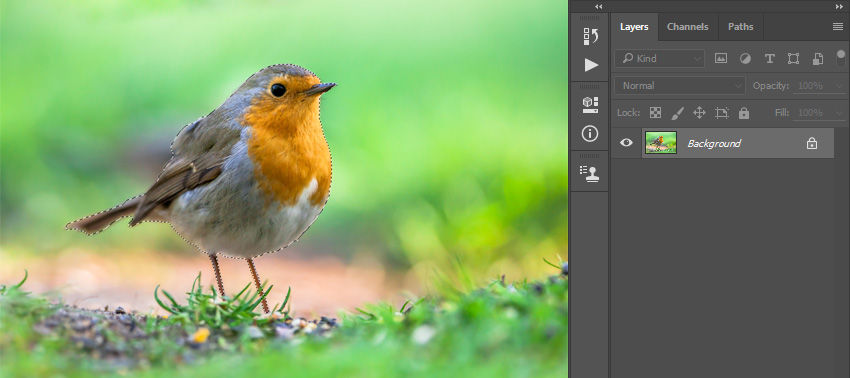
2. How to Select the Subject
Step 1
In this section, we are going to make a selection of our subject and copy it to a separate layer. Choose the Quick Selection Tool (W), and select the background of the photo. Use the Shift-Alt buttons on your keyboard to add or subtract some areas from the selection. After you've made a perfect selection, press Control-Shift-I on your keyboard to invert the selection.
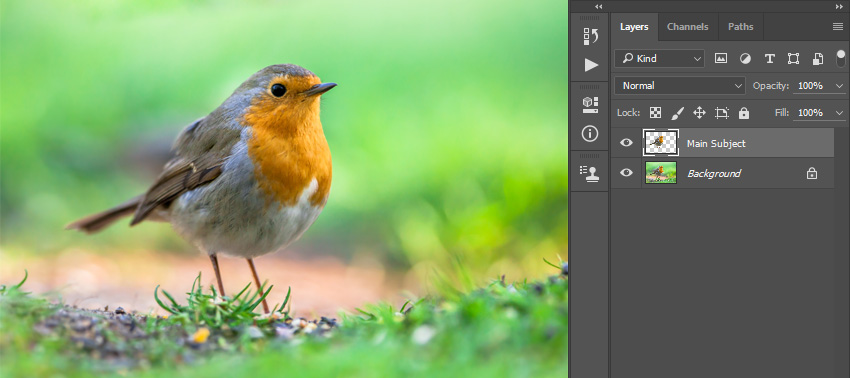
Step 2
Now press Control-J on your keyboard to create a new layer using the selection and name it Main Subject.
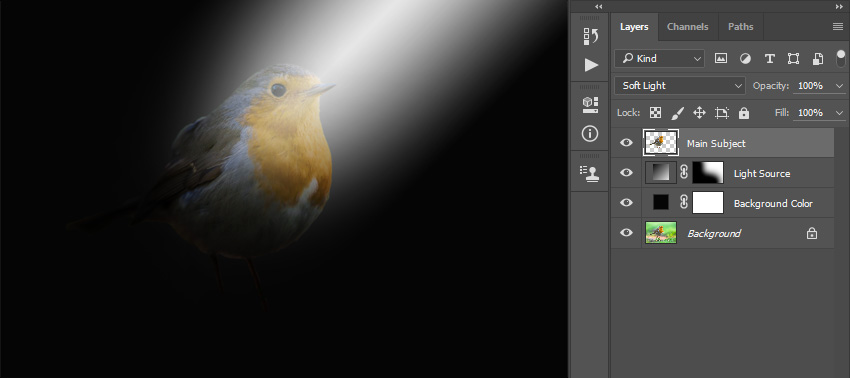
3. How to Add Lighting
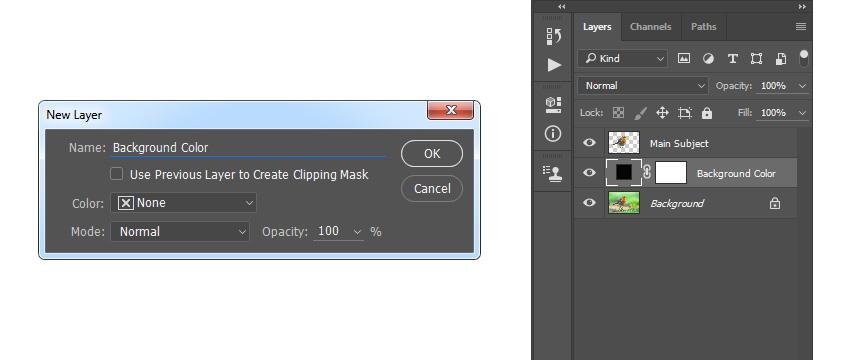
Step 1
In this section, we are going to add a lighting effect. Select the Background layer and go to Layer > New Fill Layer > Solid Color to create a new solid color fill layer. Set the color to #050505 and name it Background Color.
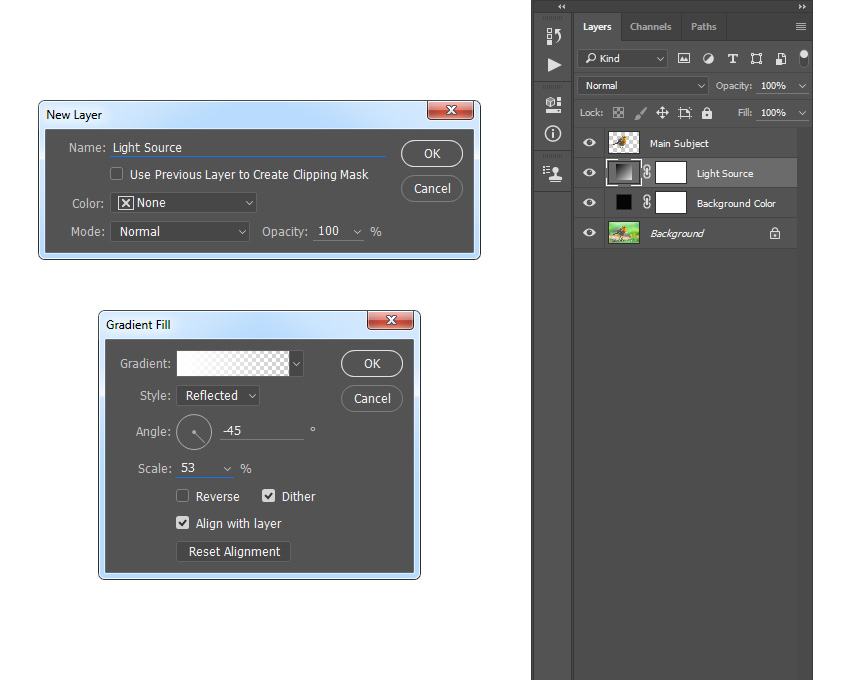
Step 2
Now go to Layer > New Fill Layer > Gradient to create a new gradient fill layer. Name it Light Source and use the settings below:
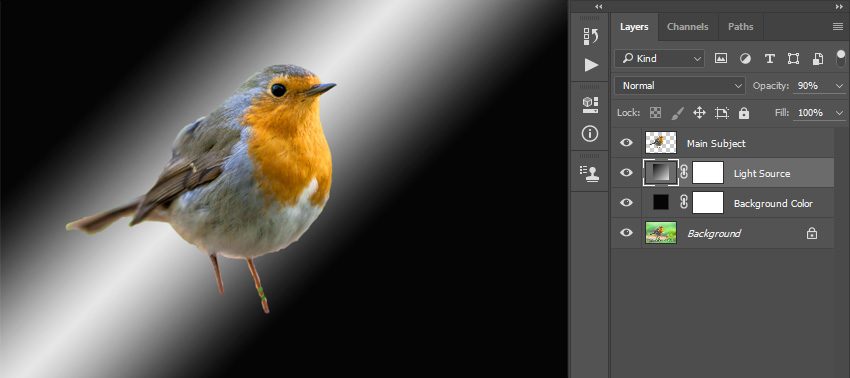
Step 3
Set the Opacity of this layer to 90%. Then, Double-click on this layer thumbnail and using the Move Tool (V), click and drag anywhere inside the canvas to position the light source as shown below:
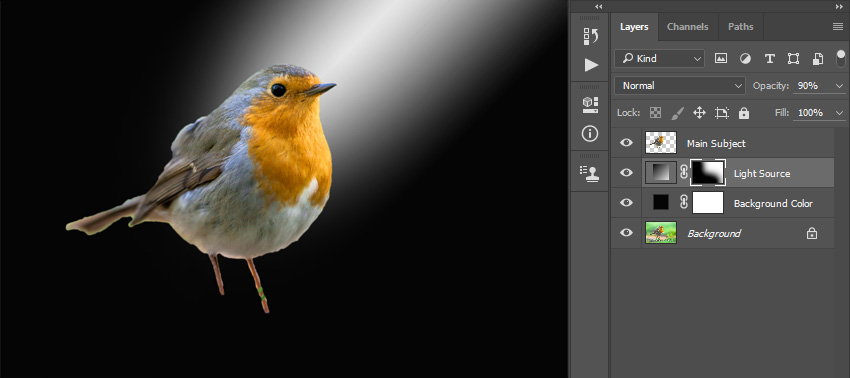
Step 4
Now select the layer mask, choose the Brush Tool (B), pick a soft brush, and set the foreground color to #000000. Then brush onto the layer mask as shown below:
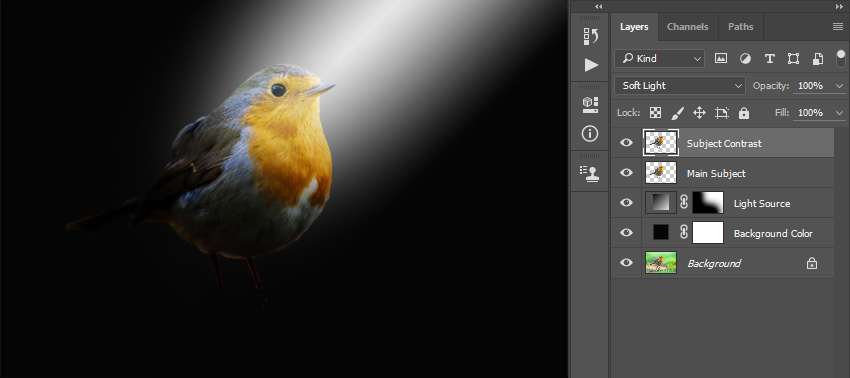
4. How to Blend the Subject
Step 1
In this section, we are going to blend the subject. Select the Main Subject layer and change its Blending Mode to Soft Light.
Step 2
Now press Control-J on your keyboard to duplicate this layer and name the new layer Subject Contrast.
 ���㲻Ҫ��
-
 Photoshop�������L�������ƬЧ����Ӣ��2018-04-23
-
 Photoshop�ϳ��L����(chu��ng)������L�i¹��Ӣ��2018-04-23
-
 Photoshop�ϳɱ�����Ч�Ľ��~������Ӣ��2018-02-10
-
 Photoshop�ϳɉ����L���ɭ�ֈ�����Ӣ��2018-02-10
-
 Photoshop�ϳ�����ʩ��������Ӣ��2018-02-10
-
 Photoshop���������|�е�3D���w�֡�Ӣ��2018-01-09
-
 Photoshop�OӋ����ȼ��ˇ�g�ֽ̡̳�Ӣ��2018-01-09
-
Photoshop�ϳɉ����L���ɭ�ֈ�����Ӣ��
���P����24492018-02-10
-
 Photoshop�����ǹ��b�ʥ�Q�䡾Ӣ��
���P����6472017-12-16
Photoshop�����ǹ��b�ʥ�Q�䡾Ӣ��
���P����6472017-12-16
