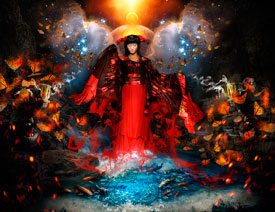
Photoshop�ϳ��L(zh��ng)����(chu��ng)����(sh��)���L(zh��ng)�i¹��Ӣ��(2)
����(l��i)Դ�� Tutsplus.com�����x���� Jenny Le �o�҂�����(l��i)��(j��ng)���ʵ����£�Step 9
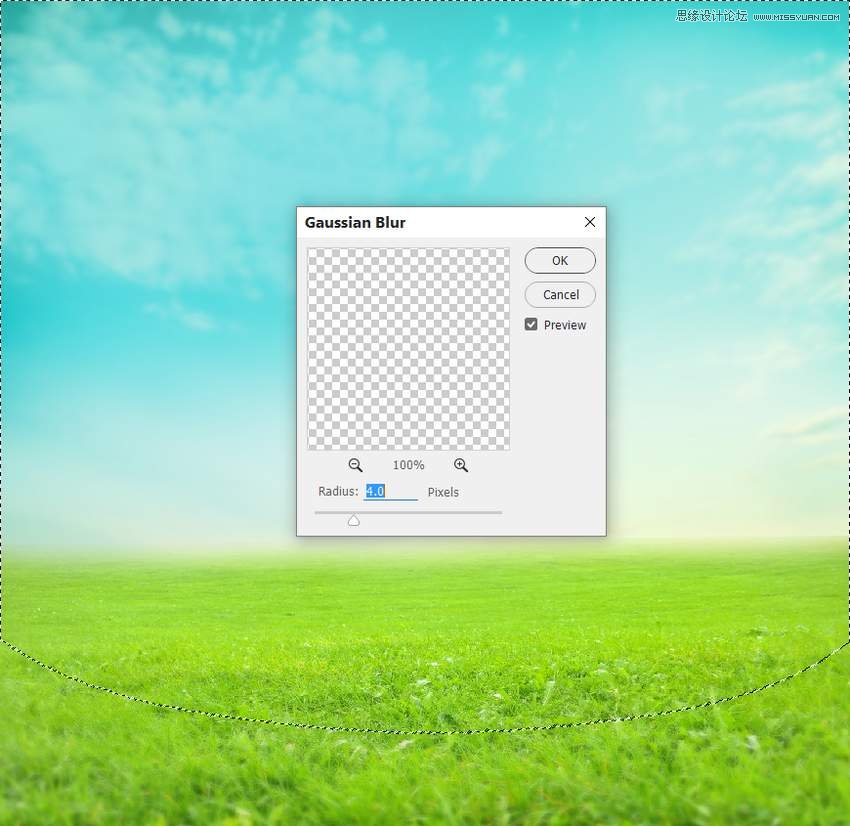
Apply a Gaussian Blur of 4 px to the meadow's layer. On the filter mask, use a soft black brush to erase the blur effect on the background and midground, leaving the blur effect visible only on the foreground.
Step 10
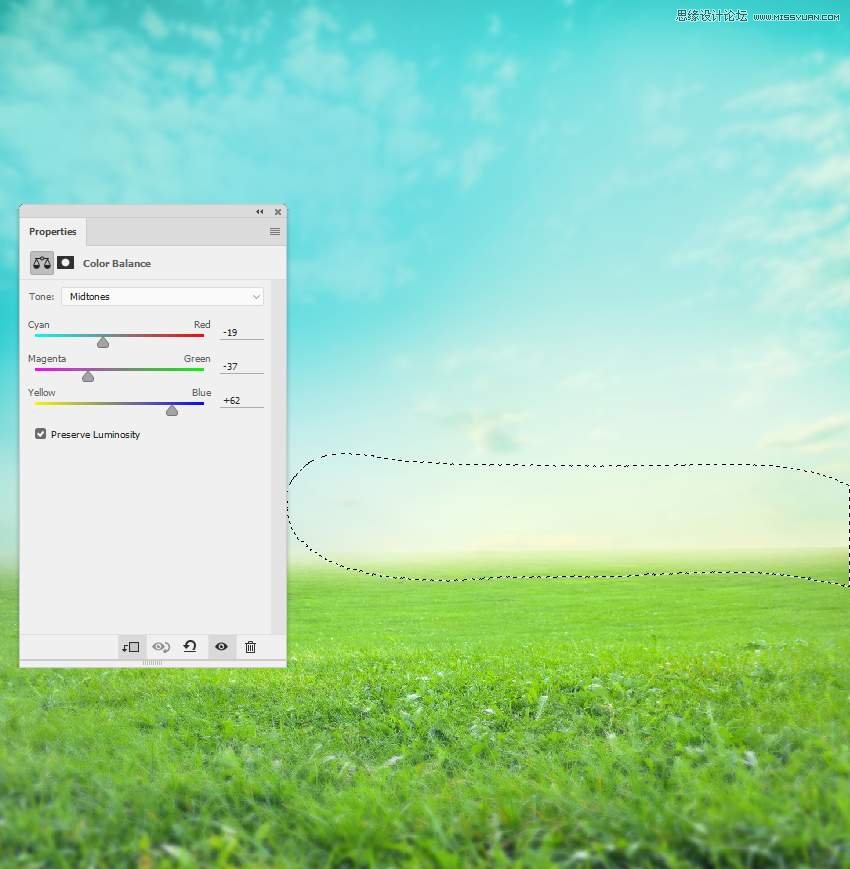
Make a Color Balance adjustment layer to change the color of the meadow. On the layer mask, paint on the right edge of the meadow to keep some yellow light there.
Step 11
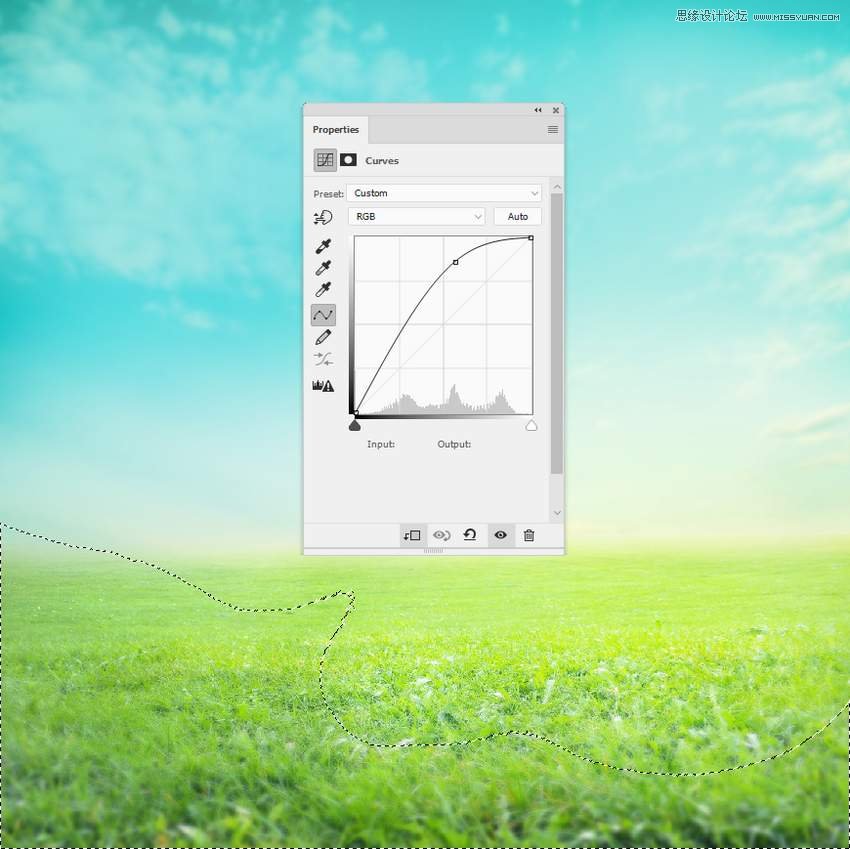
Create a Curves adjustment layer to brighten the meadow. On the layer mask, use a soft black brush to paint on the left side and the foreground so they won't be brightened by this adjustment layer.
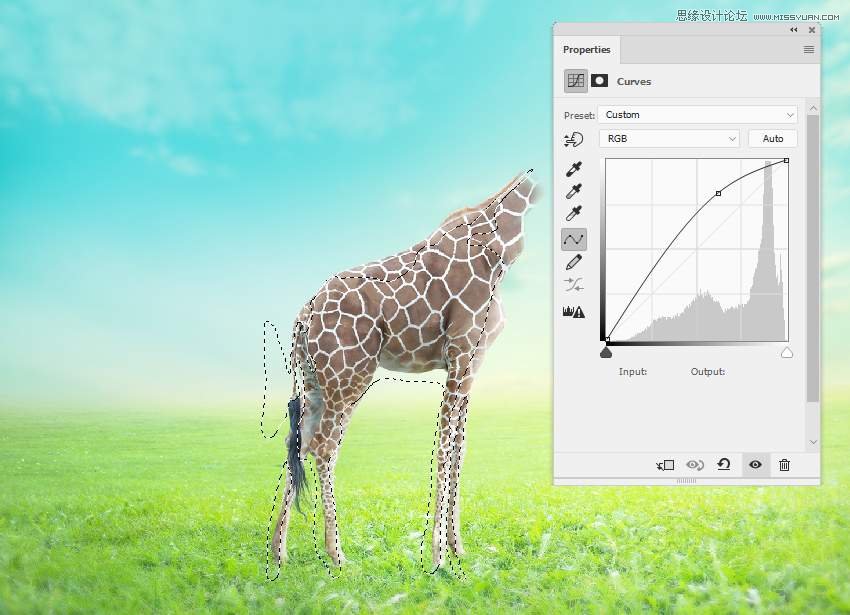
Step 12
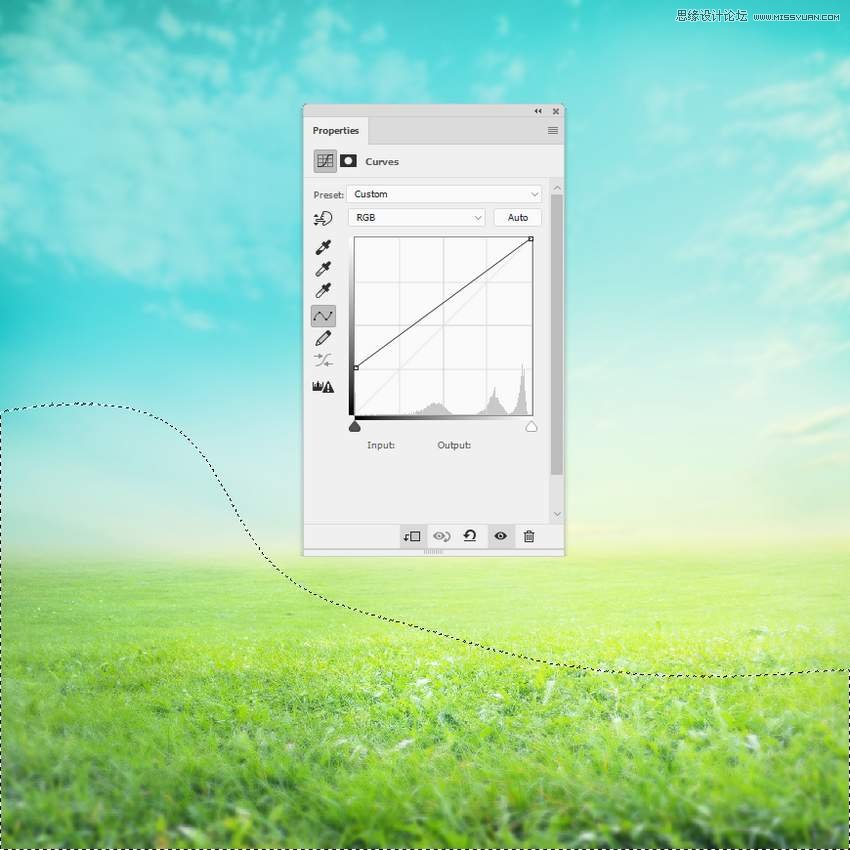
Add another Curves adjustment layer with the same purpose. The selected area in the foreground and the right shows where to paint on the layer mask.
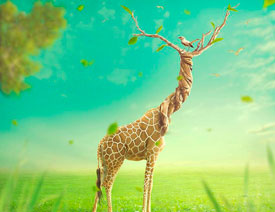
2. How to Retouch the Giraffe
Step 1
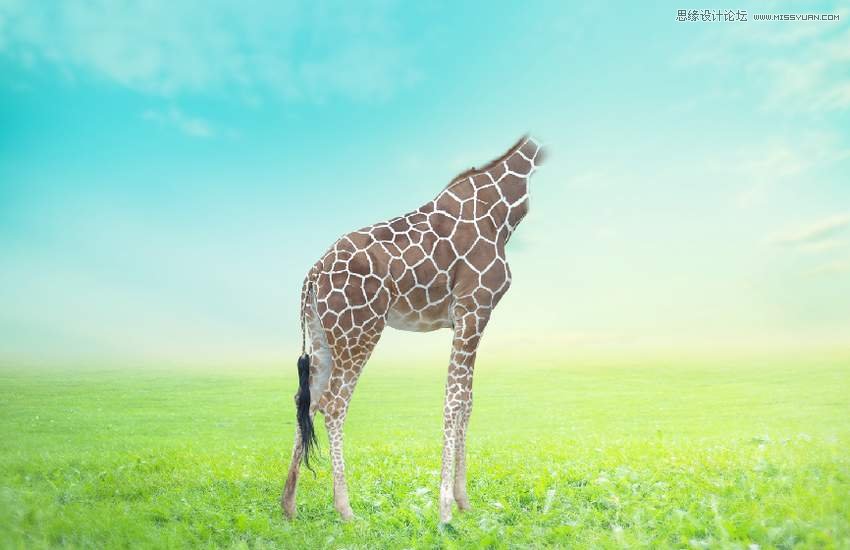
Cut out the giraffe and place him on the area near the foreground.
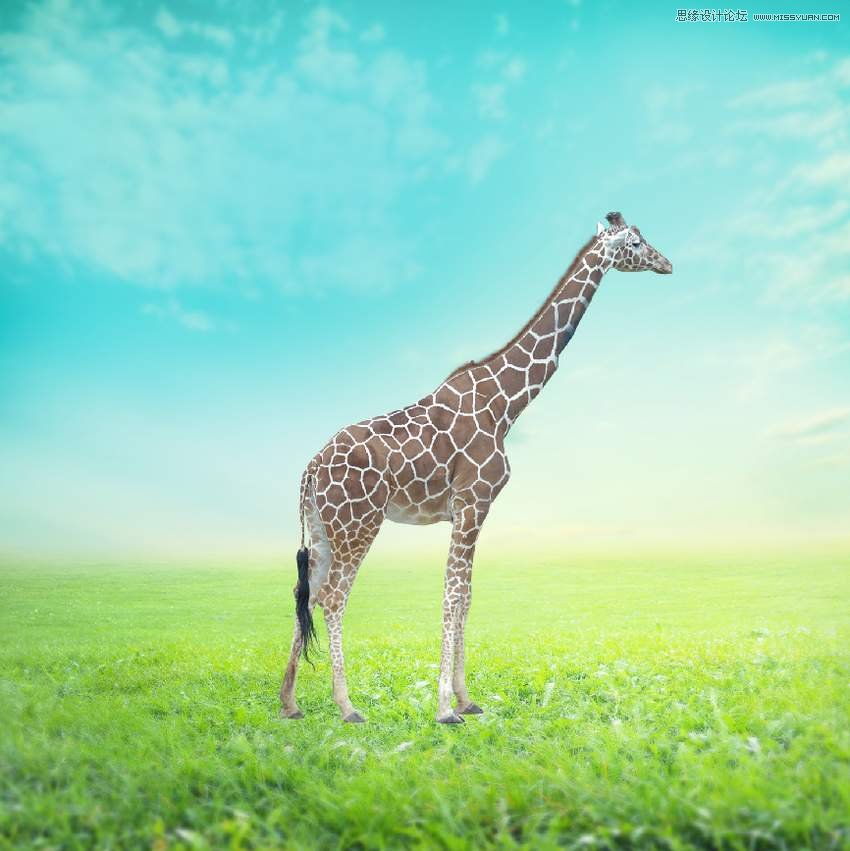
Add a mask to this layer, blend the feet of the giraffe with the grassy ground, and erase the neck. We'll replace it with a tree trunk later.
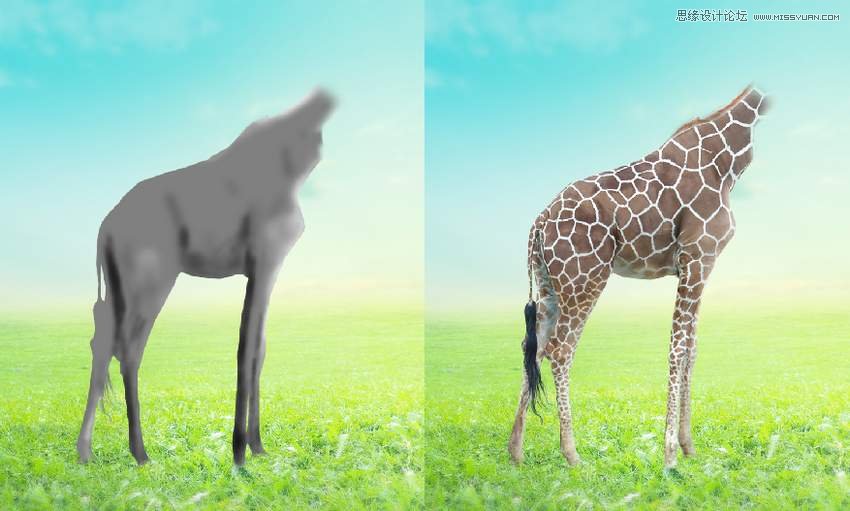
Step 2
Make a new layer, change the mode to Overlay 100%, and fill with 50% gray.
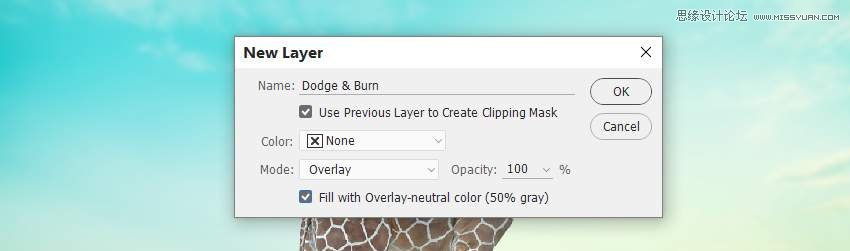
Activate the Dodge and Burn Tool (O) with Midtones Range and Exposure about 15-20% to refine the light and shadow on the giraffe. You can see how I did it with Normal mode and the result with Overlay mode.
Step 3
Create a Curves adjustment layer to make the giraffe brighter. On the layer mask, use a soft black brush to erase the shadow areas and the back side of the giraffe.
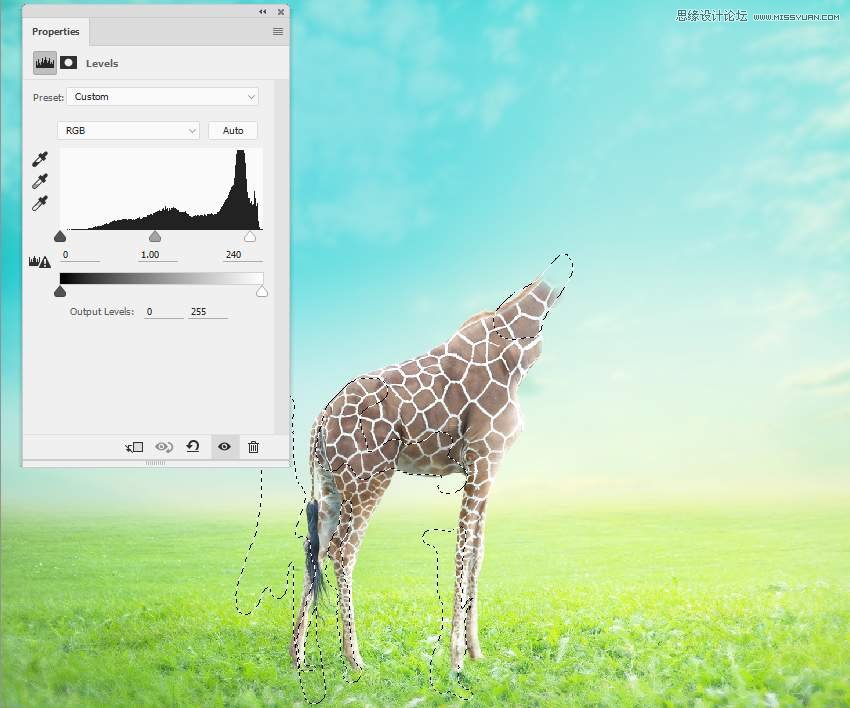
Step 4
Make a Levels adjustment layer with the same purpose.
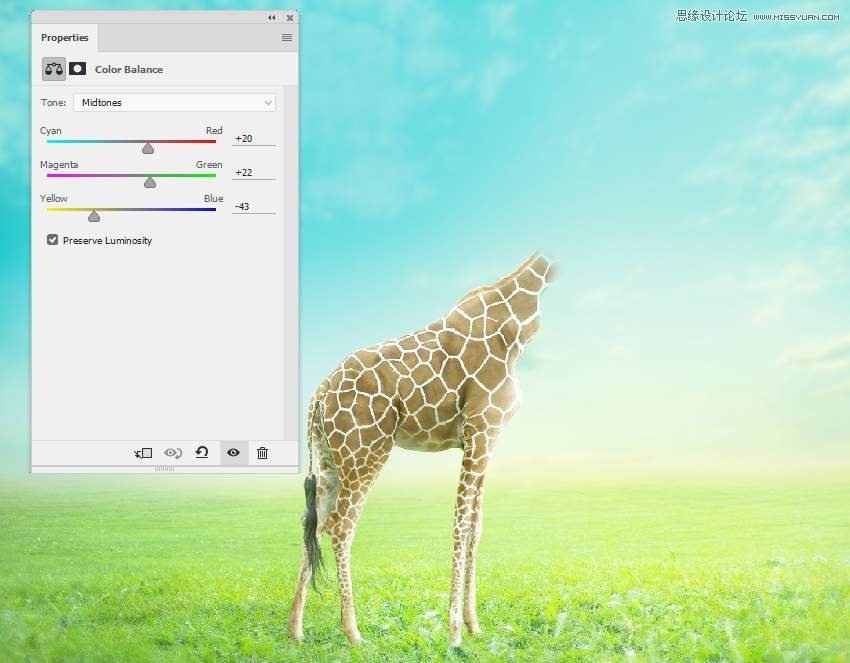
Step 5
Add a Color Balance adjustment layer to give some yellow to the giraffe. Alter the Midtones values:
Step 6
Make a Photo Filter adjustment layer and pick the color #e89e10 to make the front of the giraffe more vibrant. Paint on the rest so it won't be affected by this adjustment layer.

 ��ǵ���
-
 Photoshop������(f��)���L(f��ng)�������ƬЧ����Ӣ��2018-04-23
-
 Photoshop�ϳ��L(zh��ng)����(chu��ng)����(sh��)���L(zh��ng)�i¹��Ӣ��2018-04-23
-
 Photoshop�ϳɱ�����Ч�Ľ��~(y��)��(ch��ng)����Ӣ��2018-02-10
-
 Photoshop�ϳɉ�(m��ng)���L(f��ng)���ɭ�ֈ�(ch��ng)����Ӣ��2018-02-10
-
 Photoshop�ϳ�����ʩ��������Ӣ��2018-02-10
-
 Photoshop���������|(zh��)�е�3D���w�֡�Ӣ��2018-01-09
-
 Photoshop�O(sh��)Ӌ(j��)����ȼ��ˇ�g(sh��)�ֽ̡̳�Ӣ��2018-01-09
-
Photoshop������(f��)���L(f��ng)�������ƬЧ����Ӣ��
���P(gu��n)����11882018-04-23
-
Photoshop�ϳɱ�����Ч�Ľ��~(y��)��(ch��ng)����Ӣ��
���P(gu��n)����34052018-02-10
-
 Photoshop�����S���|(zh��)�����w�֡�Ӣ��
���P(gu��n)����7422018-02-10
Photoshop�����S���|(zh��)�����w�֡�Ӣ��
���P(gu��n)����7422018-02-10
-
 Photoshop�����@�G����3D���w��
���P(gu��n)����14682018-02-10
Photoshop�����@�G����3D���w��
���P(gu��n)����14682018-02-10
-
Photoshop�ϳɉ�(m��ng)���L(f��ng)���ɭ�ֈ�(ch��ng)����Ӣ��
���P(gu��n)����24492018-02-10
-
Photoshop�ϳ�����ʩ��������Ӣ��
���P(gu��n)����8372018-02-10
-
 Photoshop������(f��)���p���ع����w
���P(gu��n)����6532018-01-09
Photoshop������(f��)���p���ع����w
���P(gu��n)����6532018-01-09
-
 Photoshop����ľ�ذ�LOGO��ӡЧ����Ӣ��
���P(gu��n)����19272018-01-09
Photoshop����ľ�ذ�LOGO��ӡЧ����Ӣ��
���P(gu��n)����19272018-01-09
